30 November 2006

Deadlines Are Approaching.....Tick, Tick, Tick, Tick


At my most recent craft show/bazaar I was able to pick up yet a few more special orders. Giving me further opportunity to get my 'business' off and running. I've been walking quickly for quite awhile. I hope when the time comes that I can still run. LOL.

Obviously one lesson I need to learn, or more acturately a discipline I need to start employing, is not to keep accepting more work than I can handle. Gosh, why do I do that? I wish I could figure it out because I really hate being so slammed.

I guess I keep forgetting how long things take and that sometimes things so wrong, that life happens and that having a little cushion is NOT A BAD THING! I'll have to try and work on that one in the New Year.

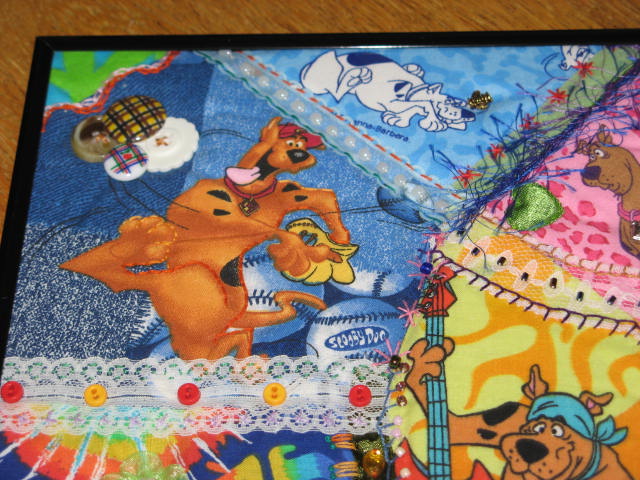
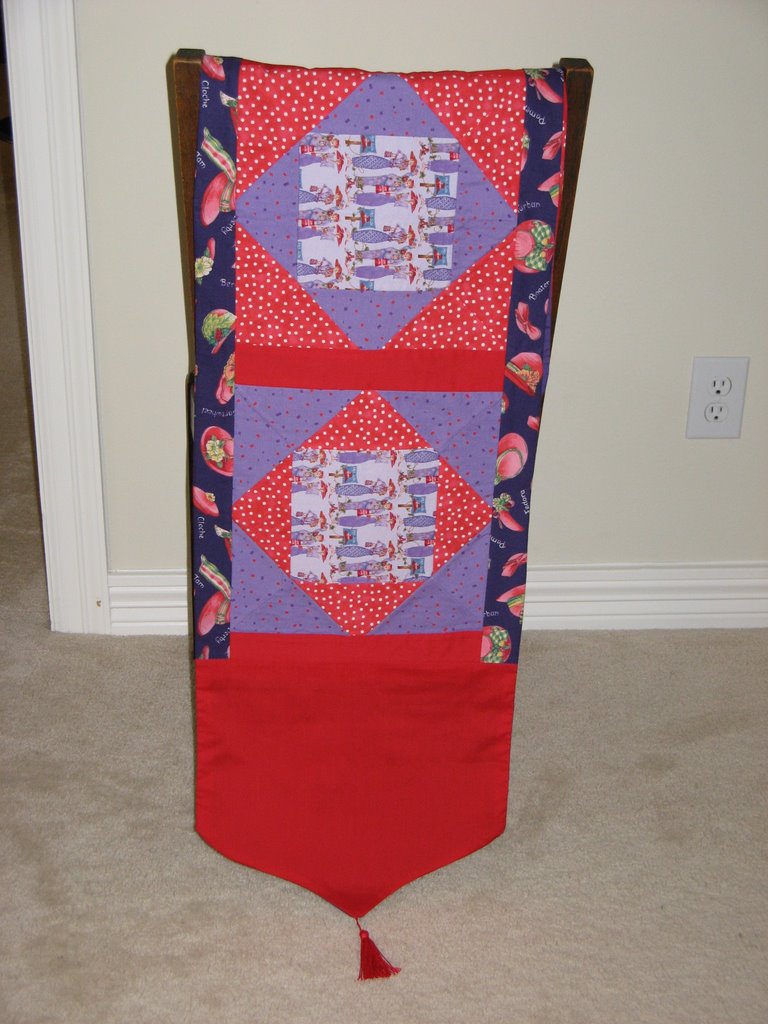
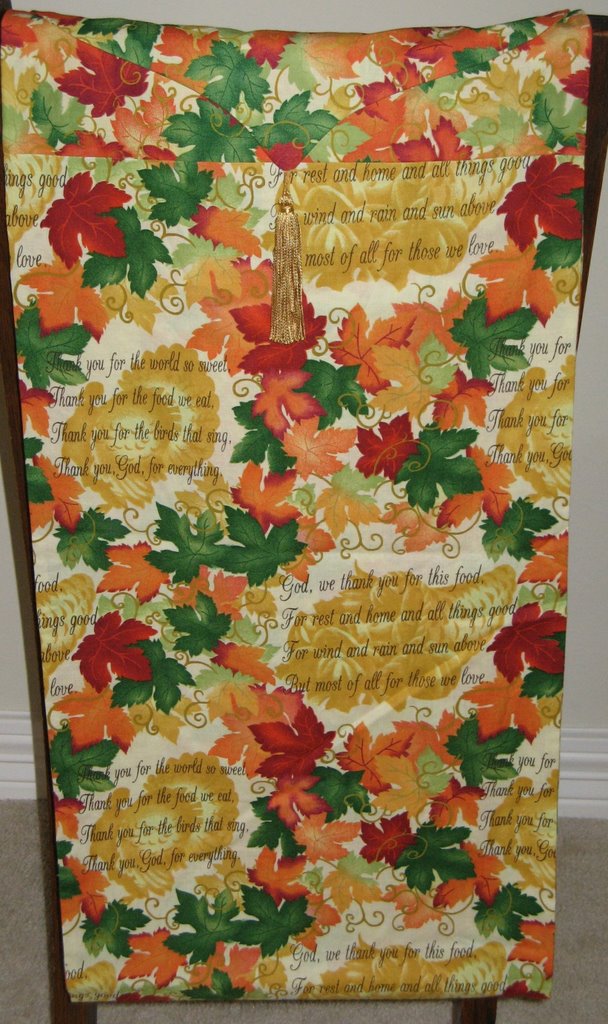
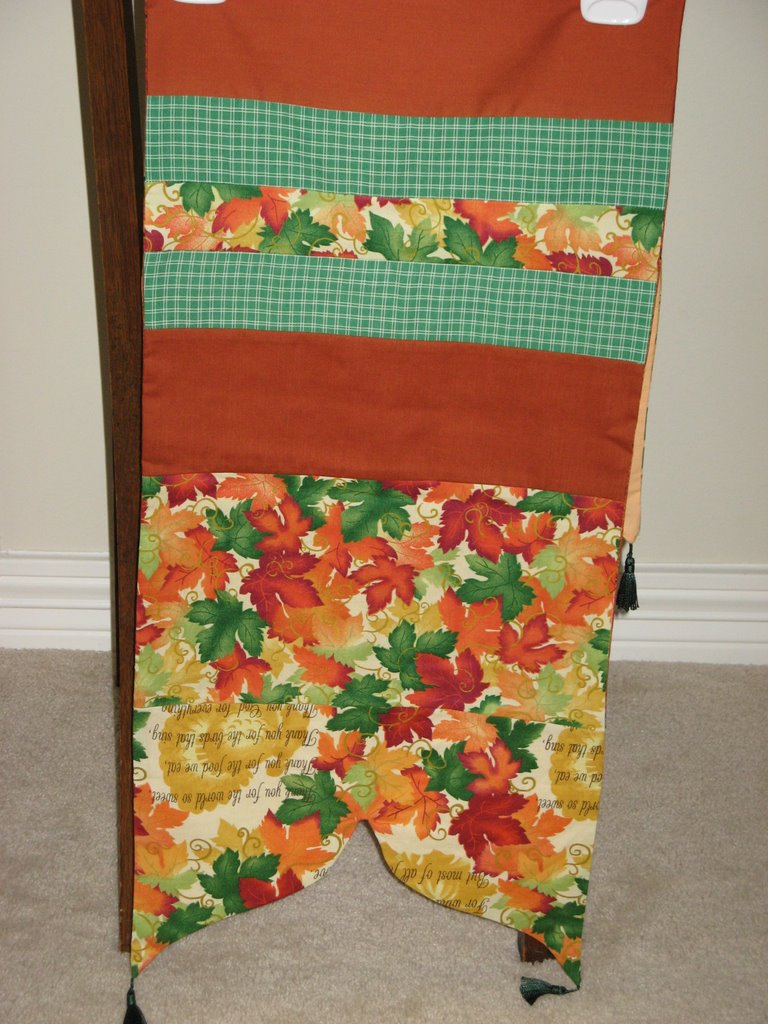
Anyway, the woman who bought this table runner asked me to make her four matching place mats. I didn't even know if I had enough of these fabrics left to do it. And forget buying more yardage. They have been out of print for a few years now. That's what happens when you stockpile and store fabrics for too long. I blame this one on not buying the bolt. That's what I usually do. I must have been having a brain cramp the day I picked these fabrics up. You can bet that won't happen again. LOL.

Well, I'm more lucky than I deserve because I have just enough to make four of them. And I'm talking just enough. I have about an extra 5-6 inches of two or three of them. I've never cut a project so close in my life. And I WILL NOT do it again.

So, here it is.....The table runner, and one of the place mats (front & back). I hate using patterns. That is unless I design them. I designed the pattern for both of these items. I figured since the table runner was so angular that the place mats should also be. That worked out perfectly because those 'missing corners' are just how much short on fabric I was.


Oh look at the clock. My break must be over. LOL. I still have three of these little babies to finish today. Tootles!

One For The Shoe Junkie


If you love quality quilting and/or shoes, you are going to really enjoy this. This is Nellies Needles, "Beach Ball Shoe." See the link on her blog or click here to view her "Imelda's Dream" shoe quilt.


I ran across this post while doing the 'blog roll' thing this morning. I love shoes. I used to buy them in every color available if when I found a style I liked. Sometimes I even bought them just because I thought they would spruce up my closet. I was a collector! LOL.

I especially love high-heels. The spiked kind---3" and taller. At 5'2" I could easily get away with wearing them. And on more that one occasion the extra height came in handy.

Now, on the downside of my 40's, I still have many, many pairs of them just gathering dust in their boxes, in my closet. I don't wear them anymore because they hurt my feet. When I was younger and fashion was more important than comfort, wearing them for 'every day' was an acceptable price to pay. LOL.

Thinking about that now, it seems oh so silly. Looking at the broken veins, and not missing the corns, it was oh so unhealthy. Aaaawwwww, the dumb things we do for vanity, and during our youth.

The thing is, I don't regret it but I do laugh at myself--often.

28 November 2006

Just Look At What I Got.....

This is so very cool. These pictures show the contents of the Birthday squishies that I received from the ladies in my Crazy Quilting for Newbies (CQN) group. This is a year long commitment to send a squishie to a different 'birthday girl' each month. I was/am October.

I know, I know, I'm about a month behind! It's been a busy time for me. Anyway, this swap is not only a lot of fun, it's an incredible stash builder. These ladies are so generous, it's heart-warming.

Well, I'm going to go play with my fancies while you drool over the photos! LOL


Thanks again to:

Elizabet


Susan


Brenda


Renea


Laura


Bethany


Judyth (Crazy Judyth's Stuff Recycled Fancy Fabrics for CQ)


Ati


Wilma


Mary


And also to our Hostess, Rebecca. Keeping track of this sort of swap is not easy!

25 November 2006

On To The Next Holiday - Christmas

Lately it seems that I just get done decorating for one holiday, and then the next one hits. Luckily with Christmas things get to stay out a little longer. This is what we've managed so far. The outside lights and tree will have to wait until the weekend.


SNOW IN TEXAS?
THIS JUST DOESN'T HAPPEN!!!!!

AT LEAST
NOT IN THE HOUSTON AREA....These pictures are from Christmas 2004. We got snow on Christmas Eve for the first time in, I believe, 89 years. It was a sight to see. And wouldn't you know, it was probably the one time that I left my Jeep in the driveway. LOL. By about noon on Christmas Day the snow was just a memory!


Scooby Doo CQ For My Dear SIL

This is my latest project. My favorite SIL just had a birthday. I managed to get the card sent out but ran late on the gift. I just got it finished and framed today. It will go out on Monday.

She is the world's biggest Scooby fan. This might me the ONLY Scooby item she doesn't have. She even works for a company that sales Scooby stuff.

Obviously my camera skills are lacking today. I didn't get a picture before I framed it, so now I get my choice of 'flash' marks or a dull flat look. DUH. Somedays, I wonder where my head is at!


The frame is for an album cover. It has self adjusting/spring type fasteners. It worked out perfectly because I had the bulk of the buttons, beads and charms. I put batting behind the CQ to absorb that bulk. Here are a few close up shots.


I had fun with it. I hope she likes it! Well, I'm outta here for now. One more project off of my list. On to the next one.....

20 November 2006

Things I Need To Do --- Catching Up!!!!

Okay, I was a little worried for awhile. But I seem to be making some progress. More actually than I expected. So here's the run down thus far....

1. Mail out both swap hearts: Susan & Renea-----DONE

2. Finish Halloween Art Doll project: Photos due by 10/31/06-----DONE

3. Work on/finish up Victorian Christmas Boot Stocking: Mail by 11/17/06-----DONE (mailed 11/20/06)

4. Work on/finish up pin cushions for craft shows: 11/11/06-----DONE (1 dozen) and 11/18/06 (2nd dozen scratched. I didn't need them after all)

5. Work on & finish 2 more COH swap hearts: by 11/10/06 (extended to 11/27/06)-----DONE

6. Put together and mail Birthday Group #2 squishie for Susan (11/06): Mail by 11/10 (extended to 11/13/06)-----DONE

7. Mail rick-rack to Elizabet: (extended to 11/13/06)-----DONE

8. Swap Heart for Maureen in AU: (extended to 11/27/06)-----DONE

9. Arty MeMe Challenge: Maureen & Jeri (extended to 12/05/06)-----DONE

I think that's it for now!

17 November 2006

2006 VBCS - Finished

It's done! It's done! My Crazy Quilted Christmas Stocking, aka Victorian Boot Christmas Stocking (VBCS) is done! And as I look at it, I'm pleased. I will be mailing it off to my swap partner on Saturday. Of course it will be stuffed with goodies and warm Holiday Wishes, too.

I had such a good time putting this boot stocking together and I'm so happy with the way it turned out that I'm going to gloat (some) and share with you the steps I took getting it to where it is now. At least the ones that I remembered to take pictures of (DUH). It's so easy to forget to do that.

As I put in a prior post, I ended up designing this boot stocking from a miss-match of patterns that I had. I had expected that when finished it would be approximately 11" long by 5 1/2" wide at the top and 6 1/2" wide at the bottom. I was surprisingly close. The only difference is that it's actually 12 1/2" long. The cuff at the top accounts for most of that difference.


I started this project in early September, still very much a 'newbie'. And I mean newbie! I joined my first CQ group, (CQN) in July, and attempted my first block in August. That block BTW is wadded up and at the bottom of my ever growing UFO and WIP pile. Anyway, I found it very interesting that I was actually able to see the improvement that I was making with my stitches while working on this project. In the beginning I was really tickled when I had 3 stitches down, fairly 'pat'. Now, I have about 6 of them working for me. LOL. The point being, that it gets easier, and practice really does make a difference.


The pictures above show the embellishing finished, the front and back pieces sewn together, and a wide(ish) strip of ribbon sewn down both sides. This I must confess was not planned. I obviously didn't leave myself enough of a seam allowance in the beginning. And as I worked on it the muslin frayed. In the end, I was able to get a 1/4" seam in it (because I put beads and things too close to the edge) and when I turned it right-sides out, I didn't catch enough of the block pieces. So, it seemed like a perfect idea to just cover it up. It took a lot of little 'by hand' stitches but it worked out nicely. I think it adds depth and dimension to the look of the piece, too.

Below you can see the 'FINISHED PRODUCT", so to speak. The boot stocking is lined and to my absolute amazement, the lining fit like a glove. First time ever I haven't struggled with a lining. The cuff at the top presented a little more of a challenge but worked out as well. There is an equal amount of the cuff portion on the inside of the stocking, so it has a really nice finished edge to it. I'm also very happy with the way the heel turned out. Actually, the boot shape in general. I was pretty concerned about it right up until the end.


And finally, just to wrap things up I've included a front and back view. There is a loop for hanging the stocking and I secured it (and hid the stitches) with a couple of buttons. I think it's a nice finishing touch.

Well, that's it for now. It's getting late and I still have loose ends to tie up for my Craft Show/Bazaar tomorrow.


08 November 2006

Two Days and Counting - 1st Craft Show

Well, here we are. Or more accurately, here I am. I have my first craft show of the year on Saturday and I'm swamped. I only had 11 months to prepare but as 'Gerry' would have it, I wait until the 11th hour and then I find my motivation. Just for the 'fun' of it, I thought I would post photos of some of my items. The first set being Christmas stockings.

The "Victorian" stockings were really quite fun to work with but much more work than I bargained for. The beads and buttons were all stitched by hand. In fact, all of my stockings have a considerable amount of hand stitching on them and they are all fully lined.


The second photo shows a faux crazy quilt design and two patchworks. I made the patchwork out of vintage fabrics and was originally going to make a bed quilt. However, it got really busy looking in a queen size so I cut it up for stockings and saved the rest for later.

I've gotten some mixed comments about the black brocade stockings. Personally, I don't see anything wrong with black decorations for Christmas. I believe that black is a necessary color, no matter the setting. And the nautical stockings were inspired by a pair that I made for friends who wanted to decorate on their sailboat last year. The last set are curly toed stockings. I did these just for a touch of whimsy! I had started making these stockings before I caught the CQ and embellishing fever. LOL. Otherwise the entire bunch would have been CQ'd.


The next category is table runners. I have a bit of a thing for 'Red Hat' even though I'm not a member of any clubs/groups. Yet, my favorite of the bunch is the 'country' runner. This fabric has to be vintage by virtue of the number of years that I've had it, and the number of years my mother had it prior to that. If this one doesn't sale this year, it's going on my antique buffet in my dining room.

While the more traditional runners are what most people are looking for, there are always those who, like me, just can't settle for straight, boring lines. So, to satisfy my creative 'inner being' I had to alter the patterns to create curves and layers.

The last bunch are tote bags that I pieced together. When DH and I vacationed in Denmark this summer, I took one of them with me and did my own R&D . It worked out so well for toting my maps and sight-seeing info, and my umbrella and camera, that I decided to keep it. I wish that I had brought more of them because I had a number of people ask me where I got it. Oh well, you just never know where a potential sale will be. LOL.

And finally, bringing up the rear are fabric hanger
covers. I just love these things for my 'special' garments. IMHO there's nothing worse than having a nice jacket or dress misshaped by using a regular hanger.


Well, here's hoping that none of it needs to be hauled back home Saturday evening.

06 November 2006

CQN - Halloween Art Doll Challenge

The CQForNewbies (CQN) group just completed our Halloween Art Doll Challenge. The challenge was to make an art doll with a CQ feel. And while there were only four entries, it was a lot of fun.

Elizabet came up with the idea, and JK, one our 'list mamas' assisted with it. Elizabet, as hostess will be providing goodies to the winner and to the other entrants. Knowing what lovely work she does, I can hardly wait to see what she sends. It might even be a piece of hand dyed lace or ribbon!

So, who won?

Well,.....(drum roll)....Christy with her 'Bat Lady.' Is this clever or what? She did a fantastic job with those wings! And of course, don't over look the spider on her belly. I'm not sure what pattern she used or if she designed it herself. She claims not to be a dollmaker. And in fact stated that this was her first doll. Obviously, she is too modest! She might just be a natural.


This little cutie, named Winnie, was submitted by Linda. I wish I could have enlarged the photo. Linda has used the most darling Halloween fabrics, and her face is sculpted. I'm actually shocked that she had the time to make a doll. She has been frantically sewing, organizing, and preparing for her daughter's wedding. You really must go to her blog. She made her daughter's dress and it is beyond gorgeous.


This 'Little Witch' was submitted by Karen. Don't you just love her little hat, with the spider? She's so cute peering out over her sun glasses, and wearing those tiny purple shoes. You can't see it in this picture but she also has a little "ZOOM" broom.


And finally, the "Cat-Faced" doll was submitted by me. I don't know why but I seem to have a flair for creating seriously gruesome dolls. I gave her 6 legs like an insect, and she double-dips with her 2 trick-or-treat bags. And no, the cape does not help her fly. LOL.


Thanks again to Elizabet for the idea, JK for the organization, Christy, Linda, and Karen, for without whom I would have been a 'shoe-in' (LOL), and thanks to the group members who took the time to vote.